Roughly 70% of discarded cowboy boots still have perfectly sound uppers — the heel is the only thing that gave out. Cowboy boot heel replacement is one of the most cost-effective repairs in footwear maintenance, and understanding when and how to do it right is the difference between a $30 fix and a $150+ rebuild. For more practical boot care advice, browse our full Boot Tips & Guides collection.
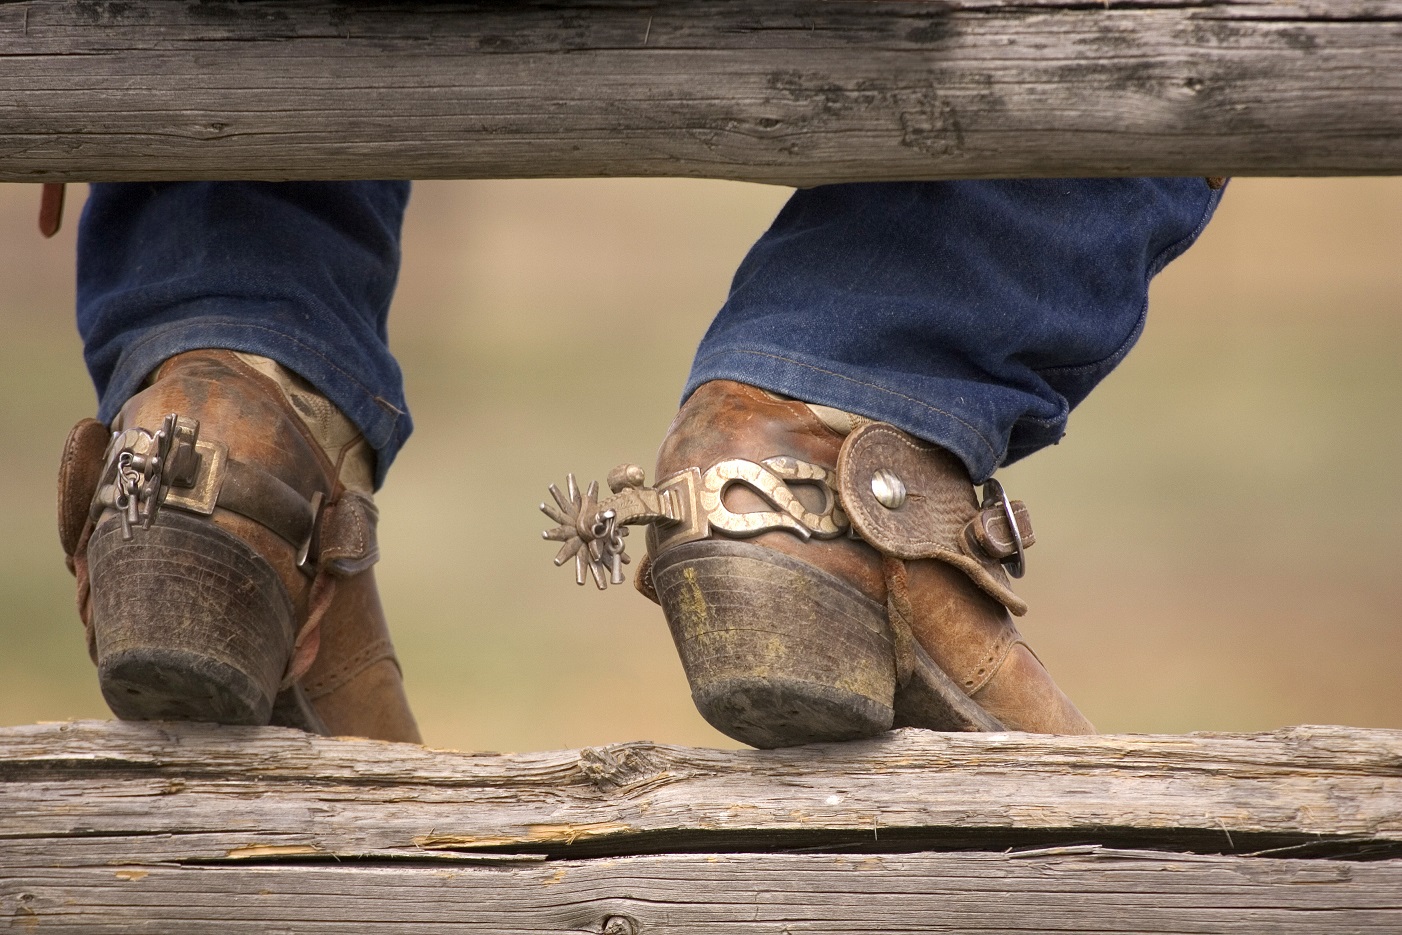
Cowboy boot heels wear down fast — especially on concrete, asphalt, gravel, or any hard surface you spend all day on. The problem isn't just cosmetic. Once wear breaks through the top-lift and reaches the rand — the leather strip that wraps the base of the boot — what started as a simple heel job becomes a full resole. That changes the cost dramatically. Acting at the right time is everything.
This guide covers the full picture: how to spot heel wear early, the mistakes that escalate repair costs, a direct comparison of DIY versus professional replacement, the step-by-step process for getting it right, and a clear cost breakdown. Whether you're fixing your first pair or your fifteenth, here's what you need to know.
Contents
- Signs It's Time for a Cowboy Boot Heel Replacement
- Mistakes That Turn a $30 Fix Into a $150 Problem
- DIY vs. Professional Heel Replacement: A Direct Comparison
- How to Get the Best Results from Every Heel Job
- What Beginners Get Wrong — And What Pros Do Differently
- The Real Cost of Cowboy Boot Heel Replacement
- Final Thoughts
Signs It's Time for a Cowboy Boot Heel Replacement
Most boot owners don't catch heel wear until it's already advanced. You want to spot it earlier — ideally before the heel stack is more than halfway gone. Catching it at the right moment keeps the repair simple and cheap.
How to Read Your Heel Wear
Flip your boots over and inspect the heel from the back and bottom. Here's what tells you a replacement is overdue:
- Top-lift worn through to the heel stack — the rubber or leather bottom cap is gone and you're grinding the stacked layers underneath
- Uneven wear across the heel base — more wear on one side than the other, which means your gait is putting asymmetric stress on the heel
- A height difference of more than 1/8 inch between your left and right boot heel
- Clicking sounds when you walk on hard floors — that's exposed nails hitting the surface
- Your ankle rolling subtly inward or outward with each step on flat ground
- The heel visibly pulling away from the upper at the back seam
Any single one of these signs is your cue to act. Two or more means you're already overdue. While you're inspecting, check the welt and rand too — if either shows damage, the scope and cost of the repair increases significantly.
Pro tip: Inspect your heels every three months if you wear cowboy boots daily. Catching wear at the 25–30% mark costs a fraction of catching it at 75% or beyond.
Protecting the Heel Stack Before It's Too Late
Prevention extends heel life and delays the need for full replacement. A few consistent habits make a real difference:
- Add heel caps — thin rubber protectors installed on new boots before the first wear — so they absorb the early abuse instead of the real heel stack
- Avoid dragging your heels across rough concrete or gravel
- Rotate between two pairs when possible so heels decompress between wearings
- Keep leather heels conditioned so they don't dry out, crack, or delaminate — read our guide on how to condition leather for the right technique and product choice
If your boots are on the newer side and you're still working through the break-in period, check out our guide on how to break in cowboy boots — how you wear new boots in the early weeks has a direct impact on how evenly the heels wear down over time.
Mistakes That Turn a $30 Fix Into a $150 Problem
Cowboy boot heel replacement is a straightforward repair — but it's easy to turn a minor job into major damage if you don't know the pitfalls. These are the most common errors, and they're entirely avoidable.
Waiting Too Long to Replace
This is the single most expensive mistake. The heel stack on a cowboy boot is built from stacked leather layers, sometimes combined with rubber. Once wear grinds through those layers and contacts the welt or rand, the repair escalates fast.
- Welt damage means the cobbler must resole the entire boot, not just replace the heel
- Rand damage compromises the structural bond between the upper and outsole — and the waterproofing
- Exposed nails and hardware create injury hazards, especially on a work site, and can gouge flooring
- Advanced wear often reveals compressed or damaged insoles that need replacing too, adding more cost
Replace the heel when the top-lift is 50% worn — not 100%. You're paying for labor either way. The only variable is how much additional damage the cobbler uncovers once the old heel comes off.
Warning: Once a nail from a severely worn heel punctures through the insole into the footbed, you're looking at potential foot injury in addition to a much more expensive repair — and a boot that may not be salvageable at all.
Using the Wrong Materials
Not all replacement heels are interchangeable. Using a cheap rubber block that doesn't match your boot's original heel profile causes fit problems, changes your gait, and produces a repair that fails in months instead of years.
Materials to avoid:
- Generic rubber heels with the wrong pitch angle — cowboy boot heels have a specific forward pitch that affects balance and how the boot sits in a stirrup
- Adhesive-only repairs on boots that were originally nailed — contact cement alone won't hold under hard daily use
- Construction adhesive or standard epoxy — these are too rigid for footwear flex and will crack or delaminate quickly
- Mismatched heel heights when replacing only one boot — even a 3mm height difference will throw off your posture and cause back and knee strain over time
Source replacement heels from a cobbler supply house or specialty boot repair shop. Match the original heel profile — height, pitch, and width base — as closely as possible. Our Boot Heels Repair: DIY Guide goes deeper on sourcing the right parts and materials for the job.
DIY vs. Professional Heel Replacement: A Direct Comparison
The honest answer is that it depends on your skill level and the extent of the damage. Here's a clear side-by-side breakdown to help you make the right call.
When DIY Makes Sense
DIY cowboy boot heel replacement is a legitimate option when:
- Only the rubber top-lift needs swapping out — this is the simplest and cheapest repair in the entire category
- You have the right tools: lasting pliers, a cobbler's hammer, heel nails, and footwear-grade contact cement
- The heel stack itself is fully intact — no cracking, splitting, delamination, or layer separation
- You've done basic leather or shoe repair before and are comfortable working with hand tools
When You Need a Cobbler
Take your boots to a professional cobbler when:
- The full heel stack needs rebuilding from multiple stacked leather layers
- There's welt or rand damage that needs resealing or replacement
- The heel is separating from the upper
- You own a high-end or custom pair and want the repair to be invisible
- The heel pitch must be maintained precisely — riding heels especially require an experienced hand
| Factor | DIY | Professional Cobbler |
|---|---|---|
| Cost | $8–$30 in materials | $30–$80+ in labor |
| Turnaround Time | 1–2 hours same day | 2–7 business days |
| Skill Required | Basic hand tool experience | None (drop off and pick up) |
| Best For | Top-lift replacement, minor wear | Full stack rebuild, structural damage |
| Risk Level | Moderate — easy to nick the welt | Low — guaranteed workmanship |
| Expected Durability | 6–18 months if done correctly | 1–3 years typical |
How to Get the Best Results from Every Heel Job
Whether you're doing this yourself or handing it off to a professional, the outcome depends on preparation and material selection. Cut corners on either and the repair fails early.
Choosing the Right Heel Type
Cowboy boot heels aren't interchangeable. You need to match the replacement to the style your boot was built around:
- Walking heel (1.5 inches): Low, stable, and flat-pitched. The most common style — ideal for all-day wear on hard surfaces.
- Riding heel (1.75–2 inches): Angled forward and narrower at the base. Designed to catch and release a stirrup cleanly. Do not replace a riding heel with a walking heel — the pitch change will throw off both your balance and stirrup use.
- Roper heel (1 inch): Short, flat, wide base. Found on roper-style and work-oriented cowboy boots where stability matters more than stirrup clearance.
- Block heel (2+ inches): Tall and square. Common on fashion-forward Western styles. Requires more precise stack alignment on rebuild.
Pitch angle is just as important as height. A riding heel has a noticeable forward lean that positions your foot correctly in the saddle and affects how you walk on the ground. Replacing it with a neutral-pitched heel changes the feel of the boot entirely.
The Replacement Process Step by Step
If you're handling a top-lift replacement yourself, work through these steps in order and don't skip ahead:
- Remove the old top-lift: Use a flat pry bar or lasting pliers. Work slowly around the perimeter — rushing this step risks scoring the heel stack below or damaging the rand.
- Pull any remaining nails: Use nippers or pliers. Don't try to drive them back in flush — pull them clean.
- Clean the bonding surface: Scrape away all old adhesive residue, then sand the surface with 80-grit paper. The new bond is only as strong as the surface prep underneath.
- Dry-fit the new heel: Hold it in position and confirm the profile matches before applying any cement. This is the step most beginners skip and immediately regret.
- Apply contact cement to both surfaces: Use a brush to coat evenly. Let it tack up for 3–5 minutes until it's no longer wet to the touch.
- Press and set the bond: Align carefully — once the surfaces touch, the bond is immediate. Use a rubber mallet to work out any gaps.
- Add heel nails: Drive two 1.5-inch heel nails through the top-lift into the stack for mechanical reinforcement. Adhesive alone won't hold under hard use long-term.
- Trim and finish: Use a sharp knife to trim overhang flush with the heel stack. Sand the edge smooth and apply edge dye to match the original color.
After the repair is complete, give your leather uppers a thorough clean and condition. Start with our guide on how to clean leather boots before you condition, then check our breakdown of boot oil vs. mink oil to pick the right product for post-repair conditioning.
What Beginners Get Wrong — And What Pros Do Differently
There's a real and consistent gap between someone doing their first heel replacement and someone who's done dozens. Here's exactly where that gap shows up.
The Beginner's Approach
First-timers tend to make the same predictable mistakes:
- Skipping the dry-fit and applying cement before confirming the heel profile actually matches
- Not cleaning the bonding surface properly — old adhesive residue is the most common cause of early delamination
- Pressing the heel while the cement is still wet instead of waiting for it to tack up
- Relying entirely on adhesive and skipping the nails, leaving the repair vulnerable under hard daily use
- Over-trimming the heel edge and ending up with an uneven profile
- Not checking whether the heel pitch changed after the swap — this matters a lot on riding-style heels
These mistakes are fixable and none of them are catastrophic on a first attempt. The correction is simply to slow down and check your work at each individual step before moving on.
The Pro's Edge
Experienced cobblers and seasoned boot repair enthusiasts approach the job with a set of habits that consistently produce better results:
- They measure heel height before and after replacement to confirm an exact match — not an eyeball estimate
- They inspect the entire heel stack before committing to the repair — if any layers are already separating, they glue and clamp those first
- They use a lasting iron to heat-set glue bonds on leather surfaces, which produces significantly stronger adhesion than cold contact cement alone
- They finish all cut edges with an edge iron and dye to make the repair visually seamless
- They confirm heel pitch on a flat surface with a ruler — not by feel
The most important edge pros have is knowing when to stop. If removing the old heel exposes deeper damage — a cracked steel shank, a separated welt seam, or a collapsing insole — they stop and reassess rather than patching over it. That discipline is what separates a repair that holds for three years from one that fails in six months.
The Real Cost of Cowboy Boot Heel Replacement
Here's what you'll actually pay, broken down by repair type and approach. These are current ballpark figures — prices vary by region and the specific cobbler or supply house you use.
Typical Price Ranges by Repair Type
- Top-lift replacement (rubber heel cap only): $20–$40 at a cobbler; $8–$15 DIY in materials
- Full heel replacement (complete stack rebuild): $45–$80 at a cobbler; $20–$40 DIY
- Heel replacement combined with resole: $100–$180 at a cobbler — necessary when the rand or welt is also compromised
- Custom or exotic leather heel rebuild: $80–$150+ depending on the material, sourcing, and complexity of the original heel design
For boots that originally cost $300 or more, professional heel replacement almost always makes financial sense. You're paying 10–20% of the boot's original cost to restore them to near-new condition — and a well-broken-in pair of quality cowboy boots is worth keeping. For budget boots under $100, you need to do that math differently.
Where to Save and Where to Spend
Spend the money here — cutting corners costs more in the long run:
- Contact cement quality: Use footwear-grade cement (Barge All-Purpose or equivalent). Standard construction adhesives are too rigid for footwear flex and will crack or delaminate under torsion stress.
- Heel profile accuracy: The right pitch and height isn't optional — an incorrect profile affects your posture, joint loading, and long-term comfort. Take the time to source the right match.
- Professional labor for full stack rebuilds: Stacked leather heel rebuilds require tools and skill that genuinely aren't worth replicating for one pair. Pay a cobbler for this one.
You can safely save here:
- Top-lift replacements — straightforward enough to DIY if you follow each step correctly
- Finishing edge dye — store-brand options perform nearly identically to premium-priced alternatives for this application
- Mail-in cobbler services versus a local shop — often significantly cheaper for standard repairs with comparable results and turnaround
Final Thoughts
Cowboy boot heel replacement is one of the most practical skills a serious boot owner can develop — and even if you never do it yourself, knowing exactly what to look for puts you in a far better position every time you take a pair to a cobbler. Inspect your heels today, add rubber heel caps if you haven't already, and save our Boot Heels Repair: DIY Guide for when you're ready to tackle the job hands-on. The boots that get maintained are the ones that last decades — and yours are worth it.


About James Miller
James Miller is a dedicated individual based in the vibrant city of San Francisco, CA, USA. His unwavering passion lies in the realm of construction, where he finds fulfillment in exploring and documenting various facets of construction equipment and processes. A graduate of the University of California Merced, James holds a dual degree in mechanical and electrical engineering, which has equipped him with a solid foundation in technical knowledge.With a keen eye for detail and a knack for articulation, James has channeled his enthusiasm into writing about the intricacies of construction gear and methodologies. His insightful writings offer valuable insights to both industry professionals and curious enthusiasts, shedding light on the machinery and techniques that shape the built environment.James Miller's educational background in mechanical and electrical engineering lends credibility to his work, allowing him to delve into the technical nuances of construction with precision. His passion for sharing knowledge and fostering understanding in the construction field is evident in his contributions, making him a respected voice in the industry.
Get FREE Boots Gifts now. Or latest free toolsets from our best collections.
Disable Ad block to get all the secrets. Once done, hit any button below