Studies show that roughly 60% of leather boot owners never apply any protective treatment, and most see their boots fade noticeably within 12 months of regular wear. If you've been wondering how to darken leather boots the right way — without streaks, damage, or wasted product — this guide gives you a clear, practical path forward. From prep work to product selection and long-term upkeep, you'll find everything you need right here. Browse our boot care category for more guides covering everything leather.
Darkening leather isn't just cosmetic. When leather absorbs conditioning oils and waxes, it deepens in color — a visual signal that the fibers are hydrated and protected. Pale, dried-out leather cracks faster, loses structural integrity sooner, and doesn't repel moisture the way it should. Getting a rich, dark finish is as much about function as it is about appearance.
This guide focuses exclusively on smooth leather — full-grain, top-grain, and corrected-grain. Suede and nubuck require entirely different products and can be permanently damaged by the oils and waxes covered here. If you're working with smooth leather work boots, read on.
Contents
Why Leather Fades and What Darkening Actually Does
Leather is a natural material made from animal hide treated through tanning. At a microscopic level, it's a dense network of collagen fibers. When those fibers dry out — from heat, UV exposure, or neglect — they lose their natural oils, become brittle, and lighten in color. That faded, grayish look on neglected boots isn't just age. It's dehydration.
Darkening methods work by reintroducing oils, waxes, or pigments into those fibers. Depending on what you use, you're either:
- Conditioning the leather — adding oils that penetrate deep and restore suppleness
- Waxing the surface — layering wax that sits on top, adds color, and provides a water-resistant barrier
- Staining or dyeing — introducing permanent pigment that bonds directly with the leather fibers
Each approach produces a different depth of color and carries different risks. Understanding which method fits your boots — and your goals — is the most important decision you'll make before picking up a product.
The Role of Tannage
Not all leather responds the same way to darkening products. Vegetable-tanned leather tends to darken dramatically with oils and waxes — even water produces a visible shift. Chrome-tanned leather is more resistant and may require more product or repeated applications. Most modern work boots use chrome-tanned leather or a combination method. Check the manufacturer's spec sheet if you're unsure which you're working with.
How to Darken Leather Boots: Step-by-Step
The process for how to darken leather boots follows the same sequence regardless of which product you choose. Skipping steps — especially the cleaning phase — is the most common reason people end up with uneven color or product buildup that flakes off weeks later.
Prep Work Before You Start
Start with clean leather. Any dirt, salt residue, or old product on the surface will block absorption and create blotchy results. Use a damp cloth or a dedicated leather cleaner, then let the boots dry completely — at room temperature, away from direct heat or sunlight. Never apply conditioning or darkening products to warm leather fresh from a dryer or left in the sun.
- Remove laces and set them aside
- Insert boot trees or stuff with newspaper to maintain shape
- Wipe down the full boot with a damp cloth — don't soak it
- Allow 30–60 minutes of drying time before the next step
Pro tip: Test any darkening product on a hidden area first — the tongue or inside of the collar — to check the color shift before committing to the full boot.
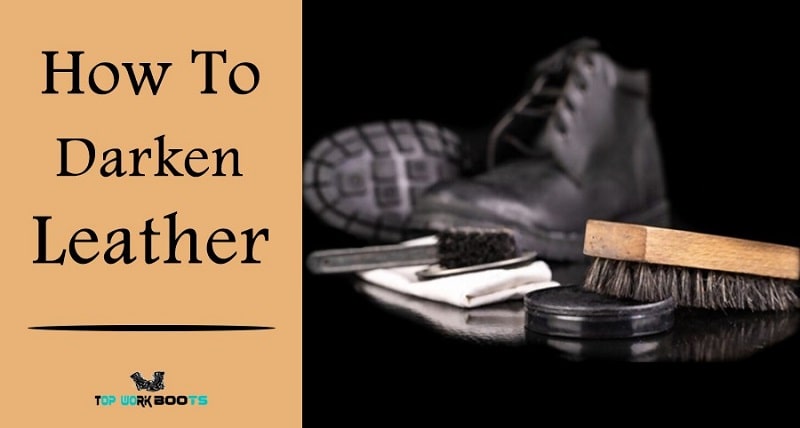
Applying Your Chosen Product
Apply your chosen product in thin, even layers using a soft cloth, horsehair brush, or your fingers. Work in small circular sections, covering the entire boot. Don't glob it on — thin coats absorb better and build color more evenly than one heavy application. Let the first coat absorb fully (10–15 minutes) before deciding whether a second pass is needed.
- Mink oil: apply with fingers or cloth, buff after 15 minutes
- Neatsfoot oil: apply with a cloth, absorbs quickly, minimal buffing needed
- Boot conditioner: one light coat is usually enough; follow product instructions
- Dark shoe polish: apply with an applicator brush, buff to a shine after drying
- Leather dye: brush on in thin coats, allow full drying between each layer
After the final coat, buff with a clean horsehair brush or soft cloth to even out the color and remove surface excess. Learning how to condition leather properly makes every step of this process more effective and gives you more predictable results over time.
Darkening Methods Compared: What the Data Shows
Different products produce significantly different results. Here's a practical breakdown of the most common darkening methods — how dark each goes, how long the effect lasts, and what to watch out for.
| Method | Darkness Level | Duration | Best For | Watch Out For |
|---|---|---|---|---|
| Mink Oil | Moderate (1–3 shades) | 2–6 weeks | Dry, neglected boots | Can soften leather over time; may stain light stitching |
| Neatsfoot Oil | Moderate to High | 4–8 weeks | Full-grain vegetable-tanned leather | Can over-soften welt stitching on some boots |
| Dark Shoe Polish | Moderate (surface) | 1–2 weeks | Finished boots needing a color touch-up | Builds up with repeated use; must be stripped periodically |
| Leather Conditioner | Subtle (1–2 shades) | 4–6 weeks | Regular maintenance darkening | Won't significantly restore heavily faded leather |
| Leather Dye | High (permanent) | Permanent | Color change or severe fading | Difficult to reverse; requires stripping old finish first |
| Boot Oil Blend | Moderate to High | 3–6 weeks | Mixed-use work boots | Some blends include silicone, which seals pores and blocks future conditioning |
For most work boot owners, mink oil or a quality leather conditioner handles the job. If you want a deeper comparison between product types, check out boot oil vs. mink oil for a detailed breakdown of how these formulas differ in real-world use.
Beginner or Pro? Matching the Method to Your Skill Level
Not every darkening method suits every skill level. Using leather dye for the first time without experience is a fast track to an uneven, blotchy result that's nearly impossible to correct. Here's how to choose based on where you are right now.
If You're New to Leather Care
Start with a quality conditioner or mink oil. These products are forgiving, easy to apply, and hard to overdo. They produce a subtle but noticeable darkening effect and double as protective treatments. Clean the boot, apply a thin coat, buff it out. That's the whole process — and it works well every time.
- Choose a conditioner with natural oils (lanolin, beeswax)
- Avoid silicone-based products — they clog pores and block future conditioning
- Apply one coat, check the result, then decide if a second layer is needed
If You Have Some Experience
Dark shoe polish in a matching shade gives you more control over color depth. You apply it in thin coats, build color gradually, and buff between layers. It takes more time but delivers a richer, more even finish than conditioner alone. Polish also fills in minor scuffs, which conditioning products won't address.
For Experienced Users Ready to Go Permanent
Leather dye is the only method that produces a true, lasting color change. Use it when conditioners and polishes can no longer bring the color back, or when you want to shift the hue significantly. Strip the old finish first with a leather deglazer, apply the dye in thin even coats, and seal with a leather finish or wax afterward. This process cannot be undone — work slowly and always test on a hidden area first.
Keeping Dark Leather Dark: A Long-Term Strategy
Getting your boots dark is half the job. Keeping them that way requires a consistent maintenance routine. Leather that isn't regularly conditioned fades again within weeks, especially with heavy daily use on a job site. The good news is that staying ahead of it takes very little time.
Build a Simple Maintenance Schedule
You don't need a complicated routine. The basics, done consistently, outperform expensive products used sporadically every time.
- After every heavy use day: wipe down with a damp cloth, let dry at room temperature
- Every 2–4 weeks: apply a thin coat of conditioner or boot oil
- Every 2–3 months: apply a dark shoe polish and buff well
- Once a season: do a full clean, condition, and inspect for cracks or wear
How often you polish depends on how hard the boots work. Read up on how often to polish shoes if you're unsure where to set your schedule for your specific situation.
Storage Matters Too
Even unused boots fade. UV light degrades leather finishes, and dry air pulls moisture out of the fibers. Store your boots in a cool, dark location — away from windows and heat vents. Use cedar boot trees to maintain shape and absorb moisture. If boots will be stored for more than a few weeks, apply a light conditioning coat before putting them away.
Consistent care keeps the leather supple and the color deep. Neglect — even leaving boots in a hot garage for a few weeks — can undo months of conditioning work. The investment in a short maintenance routine pays off in boots that look sharp and last years longer.
Frequently Asked Questions
Does mink oil permanently darken leather boots?
No. Mink oil darkens leather by rehydrating the fibers and introducing oil, but the effect is temporary — typically lasting two to six weeks with regular use. As the oil absorbs and the leather dries out again, the color fades back. Reapply on a consistent schedule to maintain the darker appearance over time.
Can you darken leather boots with household products like olive oil or petroleum jelly?
Technically yes, but it's not recommended. Olive oil can turn rancid inside the leather over time, causing an unpleasant smell and potential fiber breakdown. Petroleum jelly darkens leather temporarily but doesn't condition it and leaves a greasy residue that attracts dirt. Stick to products designed for leather — they darken and protect without the downsides.
Will darkening products work on waterproof leather boots?
It depends on the waterproofing treatment. Some coatings seal the leather surface and can prevent oil-based darkeners from absorbing properly. If your boots have a heavy wax finish or a spray-on waterproofer, clean the surface thoroughly first to improve absorption. For boots with an internal GORE-TEX or similar membrane, topical darkening products work fine on the outer leather shell without affecting the waterproof barrier.
Next Steps
- Clean your boots thoroughly before applying any darkening product — use a damp cloth or dedicated leather cleaner and allow at least 30–60 minutes of drying time before moving on.
- Choose the right method for your experience level: start with conditioner or mink oil if you're new to leather care, then move to polish or dye as your confidence builds.
- Apply your chosen product in thin coats, test on a hidden area first, and buff after each application for even, streak-free coverage.
- Set a maintenance schedule — condition every two to four weeks and polish every two to three months to keep the color from fading back between treatments.
- Store boots correctly between uses: cedar boot trees, a cool dark space, and a light conditioning coat before any extended storage period of more than a few weeks.


About Jason Flores
Jason Flores is a multi-talented individual whose unique journey has led him to blend his passion for craftsmanship and fashion into a creative endeavor. During his formative years, he found himself immersed in the world of handiwork, spending countless hours in his grandfather's workshop. These early experiences allowed him to develop a deep understanding of practical skills and a keen eye for detail.Simultaneously, Jason harbored an innate love for fashion, drawn to the artistry and self-expression it offers. As he grew older, he recognized the potential to combine his proficiency in craftsmanship with his fashion sensibilities. This realization led him to a path where he began to explore and write about the intersection of fieldwork fashion.
Get FREE Boots Gifts now. Or latest free toolsets from our best collections.
Disable Ad block to get all the secrets. Once done, hit any button below