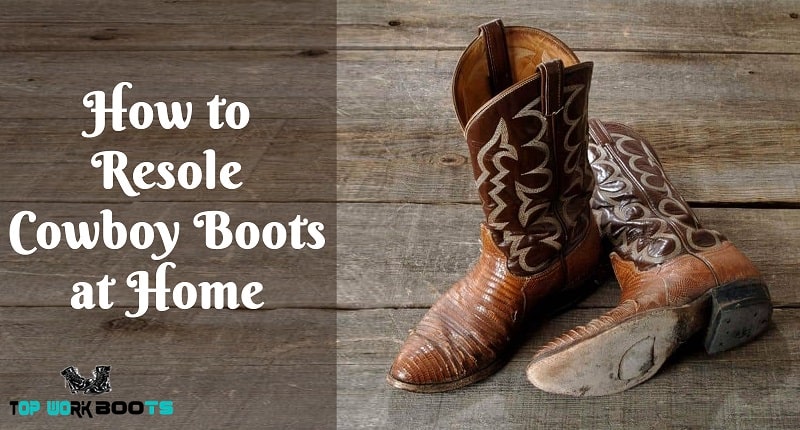
How to Resole Cowboy Boots at Home (Step-by-Step Guide 2026)
by James Miller
You can learn how to resole cowboy boots at home and save yourself $80 to $200 per pair — that's the short answer. With the right contact cement, a sharp skiver, and a methodical approach, a DIY resole holds just as long as a cobbler's work. This guide walks you through the complete process, from reading your wear pattern to finishing the edge seam. For a broader look at keeping your footwear in top condition, start with the boot care category.
Cowboy boots present challenges that standard work boots don't. The angled heel, the narrow shank, and the stacked leather construction all demand precision. Rush the adhesive cure time and you'll be peeling a sole off the barn floor within a week. Work methodically, use the correct bonding agent for your specific sole material, and the result holds for years of hard use.
Before you pick up a blade, identify your sole construction. Most traditional cowboy boots use a leather outsole with a stacked leather heel, though many modern versions add a rubber heel cap or a full rubber outsole. That distinction changes which adhesive you need and how you prep the mating surfaces. Check out different types of heels in cowboy boots if you're uncertain about your specific construction before buying materials.
Contents
When Your Boots Are Ready for New Soles
Reading the Wear Pattern
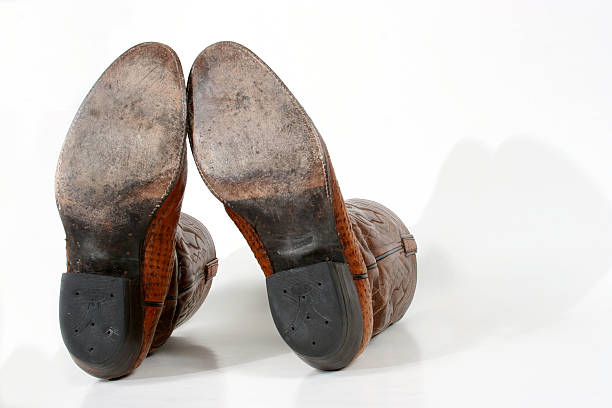
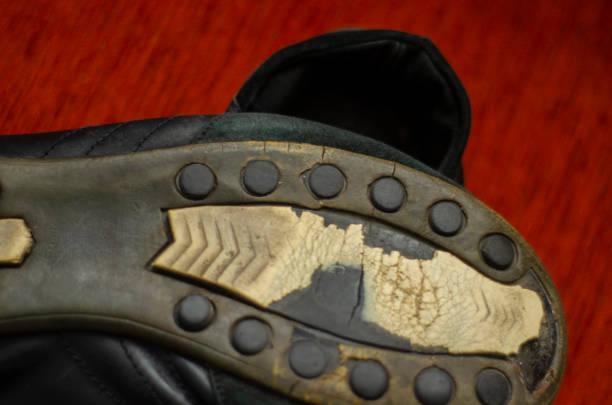
Worn soles don't fail all at once — the heel goes first. Specifically, the lateral heel corner takes the brunt of every step. Once the welt is exposed or the heel stack is reduced below a quarter inch, you're past the ideal resoling window and risking damage to the welt itself. Welt repair costs significantly more than a sole replacement, so don't wait for things to flap.
The forefoot is the second area to monitor. If you can see light through the outsole when you flex it, or if the leather has thinned to cracking, immediate replacement is necessary. Inspecting your soles every three months — especially if you work on concrete or hard floors — keeps small problems from becoming structural ones.
Which Boots Are Worth Resoling
Not every boot earns a resole. Goodyear-welted and hand-stitched construction are almost always worth it — the upper is the investment, and a quality leather upper can outlast five or six resoles. Cemented or injection-molded construction is trickier; the bond can be remade, but it rarely holds as long as welted construction under working conditions.
If the upper leather is cracking through the grain or the shank is broken, resoling a compromised boot won't give you a functional pair. Pair your resoling decision with an honest assessment of the upper. For keeping the leather in good shape before and after the job, see how to polish cowboy boots — a conditioned upper absorbs the stress of a new sole better than a dry one.
How to Resole Cowboy Boots at Home, Step by Step
Materials You'll Need
You don't need a cobbler's full toolkit, but a few specialized items are non-negotiable. Pre-cut cowboy boot outsoles are available from leather supply houses like Tandy or Springfield Leather. Everything else is available at hardware stores.
| Item | Purpose | Estimated Cost |
|---|---|---|
| Contact cement (Barge) | Primary adhesive | $8–12 |
| Sole skiver / utility knife | Removing old sole, trimming | $5–15 |
| 80-grit sandpaper | Surface roughening | $2–4 |
| 120-grit sandpaper | Edge smoothing | $2–4 |
| Leather primer | Pre-treatment for leather bonds | $6–10 |
| Edge dressing | Seam finishing | $5–10 |
| Replacement outsole | New sole material | $10–25 |
Removing the Old Sole
Start with heat. A heat gun on medium — or a hair dryer held close — softens old adhesive without scorching the leather upper. Work around the perimeter slowly, then use a thin pry tool to separate the sole from the welt. If you meet strong resistance, apply more heat rather than more force. Tearing the welt during removal is the single most common DIY mistake, and it turns a $25 repair into a $100 one.
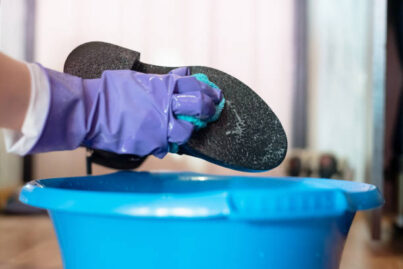
Once the sole is off, clean the welt and mating surface of all adhesive residue. A 50/50 acetone-water solution works well on leather welts; straight acetone on rubber. Let both surfaces dry for at least 20 minutes before moving on.
Preparing and Bonding
Rough both bonding surfaces with 80-grit sandpaper. This step is non-negotiable — smooth leather will not hold contact cement regardless of how much you apply. Apply a thin, even coat of cement to both surfaces, then wait until both are tacky to the touch, typically 5 to 10 minutes depending on humidity. Press firmly together starting at the toe and working toward the heel.
You get one shot at alignment — contact cement bonds on contact. Use chalk lines or tape guides on the sole edge before pressing to land it right the first time.
Trimming and Edge Finishing
Trim excess sole material flush with the welt using a sharp skiver. Take light, controlled passes — you can always remove more, never less. Follow with 120-grit sandpaper to smooth the seam, then apply edge dressing in two thin coats, burnishing between each. A clean, finished edge is what separates a professional-looking resole from a visible patch job.
The Details That Separate a Lasting Resole from a Failed One
Adhesive Selection
Never substitute rubber cement or household super glue for contact cement — those bonds fail within weeks under the constant flex and heat of a working boot sole.
Barge cement remains the industry standard because it creates a flexible, waterproof bond that handles the repetitive flex of a boot sole without cracking. For leather-to-leather bonds, apply a light coat of leather primer before the cement to open the grain and improve adhesion. For rubber outsoles, scuff aggressively — rubber surfaces are notoriously inert and resist bonding without substantial mechanical roughening.
Using Heat to Your Advantage
After pressing the bonded sole, apply gentle heat from a heat gun, then apply clamping pressure or body weight for at least 30 minutes. Heat reactivates the cement slightly, improving molecular bonding. If you're working with a heel stack, wrap it tightly with a rubber band or inner tube strip while the adhesive cures. The pressure is what does the real work — adhesive without clamping produces a bond that looks solid but fails early under load.
Keeping Your Resoled Boots in Shape
The Break-In Period
A freshly resoled boot needs 48 hours before it sees serious work. The adhesive continues curing well past the initial set, and putting immediate flex stress on it shortens bond lifespan. Wear them around the house, let the new sole conform gradually, and give the materials time to settle. If the new sole is leather, condition it lightly after the first full day of wear — dry leather soles crack at the flex point near the ball of the foot, the same way an upper does without regular care.
Ongoing Sole Care
Inspect the edge seam every month for the first three months. Any lifting at the toe or heel caught early takes five minutes to fix with a dab of cement and firm pressure. Left alone, a small lift becomes a full separation. Keep the sole out of prolonged submersion; even waterproofed leather soles degrade under sustained water exposure. Learning how to dry work boots properly prevents the moisture damage that most frequently shortens sole life. Many of the home remedies used to clean leather boots also work well on cowboy boot uppers and welt seams post-resole.
Rotating between two pairs of boots gives each pair's sole time to fully dry between wears — a practice that extends resole longevity by months.
Myths That Ruin Good Boots
Any Strong Glue Works
This belief destroys boots. Gorilla Glue, epoxy, and super glue cure rigid. A boot sole flexes hundreds of times per day at the ball of the foot, and a rigid bond shatters under that repetitive stress — often pulling chunks of the welt with it. The right adhesive flexes with the sole throughout its entire service life. According to the Wikipedia article on adhesives, contact cements are the standard for flexible substrate bonding because they retain elasticity after cure, unlike structural epoxies. This is not a preference — it's the physics of the application.
Leather Soles Are Always Superior
Rubber outsoles outperform leather in wet conditions, on concrete, and for heel-strike cushioning. A leather sole on a wet barn floor is a safety hazard. Match your sole material to your actual working environment. Many experienced resolers use a rubber outsole with a leather heel stack — you get the grip and durability of rubber at the forefoot with the traditional aesthetic of stacked leather at the heel. That's what working cobblers actually recommend for cowboy boots in demanding job site or ranch conditions.
Diagnosing a Resole That Isn't Holding
Peeling Along the Edge
Edge peeling within the first week almost always traces to one of three causes: contaminated bonding surfaces, insufficient roughening, or skipping the leather primer. Don't try to inject adhesive into the gap — fresh cement won't bond to surfaces coated with old dried cement. Strip the sole, clean both surfaces thoroughly with acetone, re-rough with 80-grit, prime the leather, and re-cement properly from scratch.
For persistent edge issues on boots that are also causing discomfort at the heel, read how to fix heel slippage in cowboy boots — sometimes what feels like a resole failure is a fit problem that no amount of sole work will resolve.
Heel Separation
The heel takes concentrated impact load on every step, making it the most common failure point in home resoling. Re-cementing alone may not be sufficient for a full separation — you may need to drive a finishing nail through the heel stack into the insole board, set the nail below the surface, and fill the countersink with shoe filler before re-dressing the edge. A separated heel left unaddressed alters your gait and can cause ankle strain. See how to prevent shoes from cutting your ankle for related comfort issues that emerge from altered boot fit. And if a new sole is changing how your boots feel around the foot, how to keep feet warm in boots covers fit and insulation adjustments that help the whole system work together.
Frequently Asked Questions
How long does a DIY cowboy boot resole last?
A properly executed home resole using quality contact cement and a full-grain replacement outsole lasts 1 to 3 years of regular use — comparable to professional cobbler work. The key variables are surface prep quality and the type of terrain you cover daily.
What is the best adhesive for resoling cowboy boots at home?
Barge All-Purpose Cement is the industry standard. It creates a flexible, waterproof bond suited for both leather and rubber substrates. Apply a leather primer first when bonding leather to leather to open the grain and maximize adhesion.
Can I resole cemented or injection-molded cowboy boots?
Yes, but with limitations. The bond can be remade, but cemented construction doesn't hold a resole as reliably as Goodyear-welted or hand-stitched boots. If the original bond failed cleanly, a resoled cemented boot can last well. If the upper itself was compromised, it's a harder case.
How much does it cost to resole cowboy boots yourself?
Expect to spend $25 to $50 in materials for a full DIY resole — replacement outsole, cement, primer, sandpaper, and edge dressing. Compare that to $80–$200 at a cobbler shop. The savings compound significantly when you resole multiple pairs over time.
Do I need special tools to resole cowboy boots at home?
A sharp sole skiver or heavy utility knife is the most critical tool. Beyond that, you need sandpaper, a heat gun or hair dryer, clamps or heavy weights, and the adhesive materials. You don't need professional lasting equipment for a straightforward resole.
How do I know if my cowboy boots are resoleable?
Check the welt. If the welt is intact and the upper leather is in good structural shape, the boots are candidates for resoling. If the welt is torn, the shank is broken, or the upper is cracking through the grain, resoling won't produce a functional boot.
Should I use a leather or rubber replacement sole?
Match the sole to your environment. Leather outsoles breathe well and look traditional but perform poorly in wet or slick conditions. Rubber outsoles offer superior grip, durability, and moisture resistance. Many working cowboys opt for a rubber forefoot sole with a traditional stacked leather heel — the best of both constructions.
How do I finish the edges after resoling cowboy boots?
Trim the excess sole flush with the welt using a sharp skiver, working in light controlled passes. Smooth the seam with 120-grit sandpaper, then apply edge dressing in two thin coats, burnishing between each application with a smooth dowel or bone folder. A finished edge is the difference between a clean resole and a visible repair.
A boot that earns a resole has already proven it's worth keeping — give the job the patience it demands and it will pay you back in years.


About James Miller
James Miller is a dedicated individual based in the vibrant city of San Francisco, CA, USA. His unwavering passion lies in the realm of construction, where he finds fulfillment in exploring and documenting various facets of construction equipment and processes. A graduate of the University of California Merced, James holds a dual degree in mechanical and electrical engineering, which has equipped him with a solid foundation in technical knowledge.With a keen eye for detail and a knack for articulation, James has channeled his enthusiasm into writing about the intricacies of construction gear and methodologies. His insightful writings offer valuable insights to both industry professionals and curious enthusiasts, shedding light on the machinery and techniques that shape the built environment.James Miller's educational background in mechanical and electrical engineering lends credibility to his work, allowing him to delve into the technical nuances of construction with precision. His passion for sharing knowledge and fostering understanding in the construction field is evident in his contributions, making him a respected voice in the industry.
Get FREE Boots Gifts now. Or latest free toolsets from our best collections.
Disable Ad block to get all the secrets. Once done, hit any button below