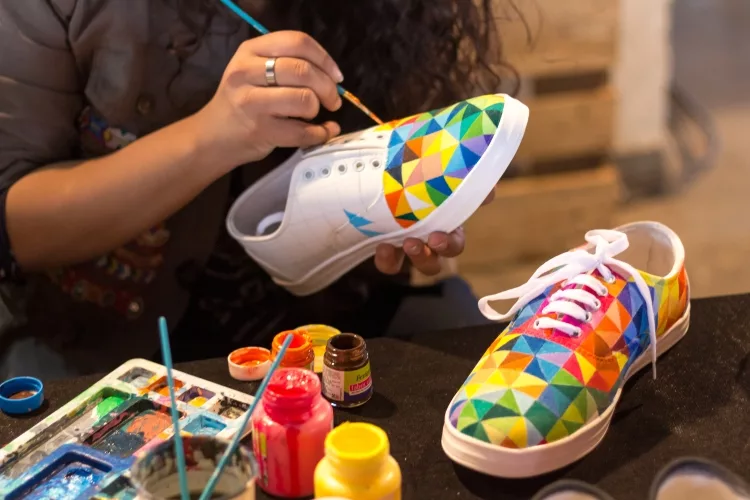
Have you ever looked at a pair of worn-out work boots and wondered if a fresh coat of color could bring them back to life? If you've been looking into how to paint shoes with acrylic paint, the answer is yes — and it works better than most people expect. Acrylic paint bonds to leather, synthetic materials, and canvas, giving you a durable and flexible finish when you do it right. Whether you want to restore a faded pair of boots or completely change their color, this guide covers everything from the right materials to pro-level technique. For a broader look at keeping your footwear in top shape, start with our boot care guide here at TopWorkBoots.
The process is more forgiving than you might think. You don't need an art degree or expensive equipment. What you do need is patience, the right prep steps, and a few quality materials. Skipping prep is the number one reason paint peels, cracks, or flakes off — so this guide puts heavy emphasis on getting your shoes ready before a single drop of paint touches them.
Before diving in, understand that not all shoes respond the same way to acrylic paint. Smooth leather takes it differently than suede, and rubber soles need their own approach. Knowing those differences upfront saves you real frustration. Let's get into it.
Contents
What You Need to Paint Shoes With Acrylic
Getting your supply list right before you start saves you from a mid-project run to the store. The materials aren't expensive, and most are reusable across multiple pairs of shoes.
Paints and Sealers
Not all acrylic paints are equal for this job. Angelus leather paint is the gold standard — it's formulated specifically for flexible surfaces, so it moves with the shoe instead of cracking under stress. Standard craft store acrylics like Apple Barrel or Folk Art can work on canvas or rubber soles, but they're risky on leather because they lack flex additives. Pair your paint with a flexible finisher or sealer (Angelus makes one called "2-Soft") to lock everything in and prevent scuffing. Understanding what type of boot you're working with matters here — leather, synthetic, and fabric all behave differently under paint and require slightly different approaches.
Tools and Prep Materials
Beyond paint, you'll need pure acetone (not nail polish remover with additives) for deglazing leather, fine-grit sandpaper (220–400 grit) for roughing up glossy surfaces, soft-bristle paintbrushes in multiple sizes, painter's tape to protect soles and laces, and clean cotton balls or rags. A palette or mixing tray helps when blending custom colors. Before any of this, your shoes need a thorough cleaning. Check out these home remedies for cleaning boots that work on most leather uppers without damaging the material — then let them dry completely before you pick up the paintbrush.
The Real Benefits and Drawbacks of Acrylic Shoe Paint
Acrylic paint is one of the most versatile shoe customization tools available, but it's not a magic fix for every problem. Here's an honest look at what you're signing up for.
Why Acrylic Works Well on Shoes
Acrylic paint dries fast, comes in hundreds of colors, and cleans up with water while it's still wet. When sealed correctly, it holds up well to regular wear. Unlike oil-based paints, it won't yellow over time. It's also water-resistant once fully cured — useful on a work boot that sees mud, rain, and long hours. You can touch up small areas without redoing the whole shoe, which makes it practical for maintaining a custom paint job over the long haul.
What to Watch Out For
The biggest risk is cracking. Thick coats and poorly prepped surfaces are the main culprits. Acrylic also struggles on suede and nubuck — the brushed texture traps paint unevenly and is nearly impossible to clean off if you change your mind. Heavy flex zones, like the vamp (the front part of the shoe that bends with your foot), require flexible paint and multiple thin coats to survive repeated bending without breaking down.
| Factor | Acrylic Paint | Leather Dye | Fabric Paint |
|---|---|---|---|
| Best surface | Smooth leather, canvas, rubber | Smooth leather only | Canvas, fabric uppers |
| Flexibility | High (with flex additive) | Very high | Medium |
| Color range | Unlimited | Limited | Unlimited |
| Durability | High when sealed | Very high | Medium |
| Reversibility | Difficult once sealed | Permanent | Moderate |
| Skill level | Beginner-friendly | Intermediate | Beginner-friendly |
When Painting Your Work Boots Makes Sense (And When It Doesn't)
Choosing the right shoe for a paint job is just as important as technique. Some boots are ideal candidates. Others will waste your time and supplies.
Good Candidates for Painting
Smooth leather and synthetic leather work best. If you have work boots that are structurally sound but cosmetically faded, scuffed, or just the wrong color, painting is a legitimate restoration option. Canvas sneakers take acrylic paint beautifully. Boots you want to personalize — adding a design, changing the color, or color-coding them for easy identification on a busy job site — are perfect candidates. Rubber toe caps and midsoles also respond well to acrylic. Whether your boots have composite or steel toe protection doesn't affect the painting process on the upper, but it's useful to know your boot's construction before you start masking off areas.
Work boots that have been resoled or repaired are also solid candidates. As long as the upper is clean and structurally intact, paint adheres well. If you're planning a full color change from dark to light, set the expectation now that it may take six or more coats for even coverage.
When to Skip the Paint
Suede and nubuck are hard nos. The porous, brushed surface absorbs paint unevenly, and the result rarely looks clean or professional. Heavily worn boots with cracked, dry leather are also poor candidates — paint doesn't fill structural damage, and cracked leather keeps moving in ways that break the paint film fast. If your boots are falling apart at the seams, put that energy toward a new pair instead. Boots with active waterproof membranes — like Gore-Tex liners — can have their breathability compromised if paint seals the outer material too heavily. And if your boots just need a deep clean rather than a new look, check out our guide on removing tough messes from shoes before you reach for the paintbrush.
How to Paint Shoes With Acrylic: Pro Tips for Best Results
This is where technique separates a paint job that lasts two years from one that starts peeling in two weeks. Follow these steps carefully and your results will look professional.
Prep the Surface First
Clean your shoes thoroughly and let them dry completely before anything else. Any dirt, oil, or wax left on the surface blocks adhesion. After cleaning, use a cotton ball soaked in acetone to deglaze leather — this strips the factory topcoat (sometimes called a "finisher") that would otherwise prevent the paint from bonding. Wipe the whole upper down, then air dry for 15–20 minutes. If you've just washed your boots, our guide on how to dry work boots shows how to do it without warping or cracking the leather. Once dry, tape off the sole, laces, and any areas you don't want painted.
Pro tip: Never skip the deglazing step — if the factory finish isn't fully removed, your paint will peel no matter how many coats you apply on top of it.
Apply Paint in Thin Layers
This is the single most important rule in the entire process: thin coats, many layers. Load your brush lightly and apply smooth, even strokes moving in one direction. Let each coat dry completely before applying the next — usually 15 to 30 minutes depending on humidity. Rushing this step is the most common cause of cracking. Expect to apply five to eight coats for full, even coverage. Mix a few drops of Angelus 2-Soft directly into your paint at roughly a 1:5 ratio (softener to paint) to improve flexibility on high-bend areas. Acrylic paint forms a polymer film as it cures — the flex additive keeps that film from becoming brittle over time.
Seal for Durability
Once your final coat is fully dry — wait at least one hour — apply a leather finisher or acrylic sealer. Choose a flat or matte finish for a natural look, or gloss for a high-shine effect. Two thin coats of sealer provide the best protection. Let the shoes cure for 24 to 48 hours before wearing them. If your paint job chips or scuffs after months of hard use, a light sand and touch-up coat followed by fresh sealer brings it back. Keeping light-colored shoes clean after painting takes a bit of extra attention — our guide on removing stains from white shoes covers gentle cleaning methods that won't disturb a sealed finish.
Acrylic Paint on Work Boots: Real Results
It helps to know what's actually achievable before you commit time and money. Here's what tradespeople and boot customizers consistently report from real-world use.
Painting High-Wear Areas
The toe box and heel counter (the stiff back section of the boot) are the most popular areas for touch-up painting. Both take acrylic well because they're relatively rigid and don't flex much during normal wear. Scuffs on toe caps respond especially well — a few thin coats of matching color plus a sealer and the repair is nearly invisible. The sides of the midsole (the layer between the upper and the outsole) are also common targets. Because they're rubber or EVA foam, they accept standard acrylic or specialized rubber paint cleanly. If you want to protect a fresh paint job on the job site, check out how to make DIY boot covers to keep your work from getting ruined during a messy shift.
Full Boot Customization
Full custom paint jobs on work boots are more common in trades like construction and warehousing than you might expect. Color-coded boots help crews identify roles or departments fast on large job sites — and a well-executed paint job holds up through a full work season. A full respray in a single color is straightforward: deglaze, apply six to eight thin coats, seal. Multi-color designs or logos require stencils and painter's tape to keep edges sharp. Work section by section, masking off areas as you go, rather than trying to freehand the entire design at once. With proper prep and a quality sealer, a full custom job on smooth leather work boots holds up well to daily wear and looks intentional, not improvised.
Frequently Asked Questions
Can you use regular acrylic craft paint on shoes?
You can use it on canvas or rubber surfaces, but on leather it's a risk. Regular craft acrylics lack the flex additives that allow the paint film to move with the shoe. Angelus leather paint or similar shoe-specific acrylics are a much better choice for leather uppers and will hold up far longer before cracking.
How do you keep acrylic paint from cracking on shoes?
Apply thin layers and let each one dry completely before adding the next. Mix a flex additive like Angelus 2-Soft into your paint at about a 1:5 ratio. Always seal the finished paint job with a flexible finisher. Cracking almost always comes from thick coats, skipped drying time, or missing the final sealer step.
Do you need to prime shoes before painting with acrylic?
On leather, the equivalent of priming is deglazing — removing the factory topcoat with acetone. This creates a clean, porous surface for the paint to bond to. On canvas or fabric, you don't need a separate primer, but a light sanding helps the first coat of paint adhere more evenly.
How long does acrylic paint last on shoes?
A properly prepped and sealed paint job on smooth leather can last one to three years of regular use before needing a touch-up. High-flex zones like the vamp wear faster than rigid areas like the toe box. Reapplying a thin coat of sealer every six months significantly extends the paint's lifespan.
Can you paint the rubber sole of a shoe with acrylic?
Yes. Clean the rubber with acetone, rough it up lightly with fine-grit sandpaper, then apply acrylic paint formulated for flexible surfaces. Seal with a rubber-compatible finisher. The paint holds well on the sides of the sole that don't contact the ground, though the very bottom will scuff quickly from walking.
Is acrylic paint waterproof on shoes once dry?
Once fully cured and sealed, acrylic paint is water-resistant — not completely waterproof, but it handles rain and job-site mud well. The sealer does most of the protective work. Avoid submerging painted leather in standing water for extended periods, as prolonged moisture can eventually soften the paint film.
Can you paint over old paint on shoes?
Yes, if the existing paint is still well-adhered. Lightly sand the surface, wipe down with acetone, and apply your new coats. If the old paint is peeling or cracked, remove it fully first — painting over damaged layers traps the problem underneath and accelerates new peeling.
Final Thoughts
Now that you know how to paint shoes with acrylic paint the right way, you're ready to take a scuffed or faded pair of work boots and turn them into something worth lacing up again. Pick up your supplies, commit to the prep, and trust the thin-coats process — your boots will thank you for it. Head over to the boot care section for more practical guides to keep your footwear performing its best, season after season.


About James Miller
James Miller is a dedicated individual based in the vibrant city of San Francisco, CA, USA. His unwavering passion lies in the realm of construction, where he finds fulfillment in exploring and documenting various facets of construction equipment and processes. A graduate of the University of California Merced, James holds a dual degree in mechanical and electrical engineering, which has equipped him with a solid foundation in technical knowledge.With a keen eye for detail and a knack for articulation, James has channeled his enthusiasm into writing about the intricacies of construction gear and methodologies. His insightful writings offer valuable insights to both industry professionals and curious enthusiasts, shedding light on the machinery and techniques that shape the built environment.James Miller's educational background in mechanical and electrical engineering lends credibility to his work, allowing him to delve into the technical nuances of construction with precision. His passion for sharing knowledge and fostering understanding in the construction field is evident in his contributions, making him a respected voice in the industry.
Get FREE Boots Gifts now. Or latest free toolsets from our best collections.
Disable Ad block to get all the secrets. Once done, hit any button below